Home Page Instructions
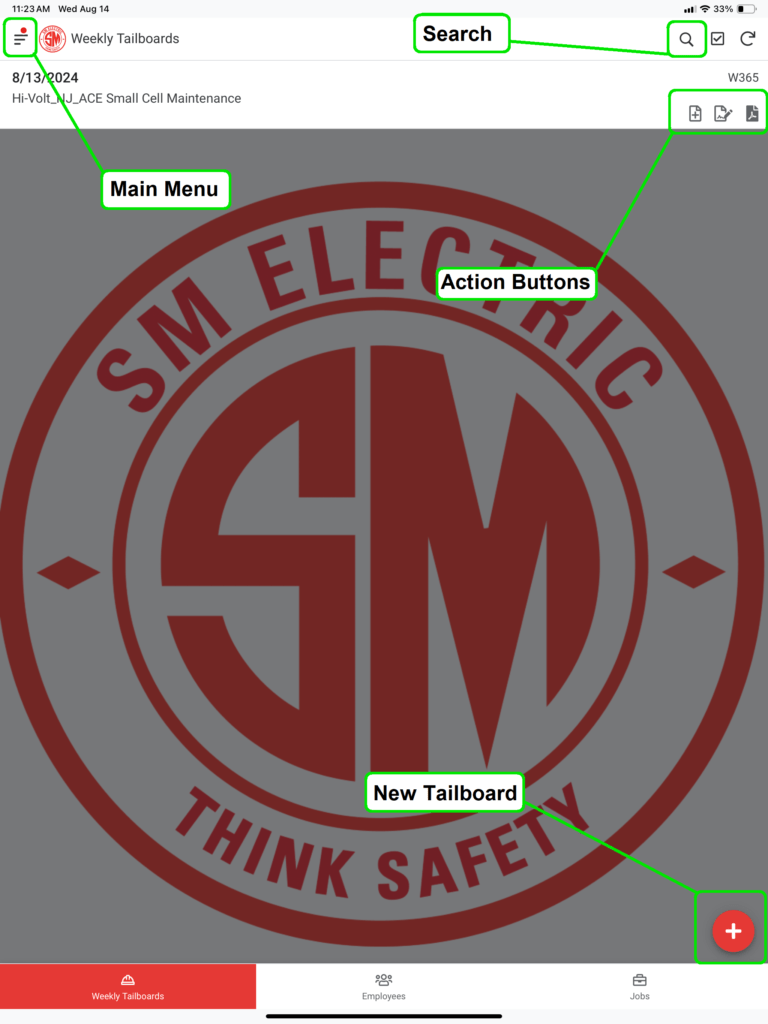
1 – To start a new Tailboard tap on the “+” button in the bottom right corner
2 – To find a current Tailboard that was created up to 7 days ago locate it in the main list. To search or filter the list tap on the magnifying glass icon in the top right corner of the app. Older Tailboards can be accessed in the main menu located on the top left corner of the app.
3 – To edit the current Tailboard tap on the edit button(left action button) or on the row directly.
4 – To add signatures to the current Tailboard, tap on the signatures button (center action button)
5 – To view the current Tailboard tap on the PDF button(right action button)
*A Tailboard that was just created wont show up immediately. Please wait 3-5 minutes and refresh the app by pulling down on the screen or tapping the refresh button on the top right corner of the screen.
Information Page Instructions
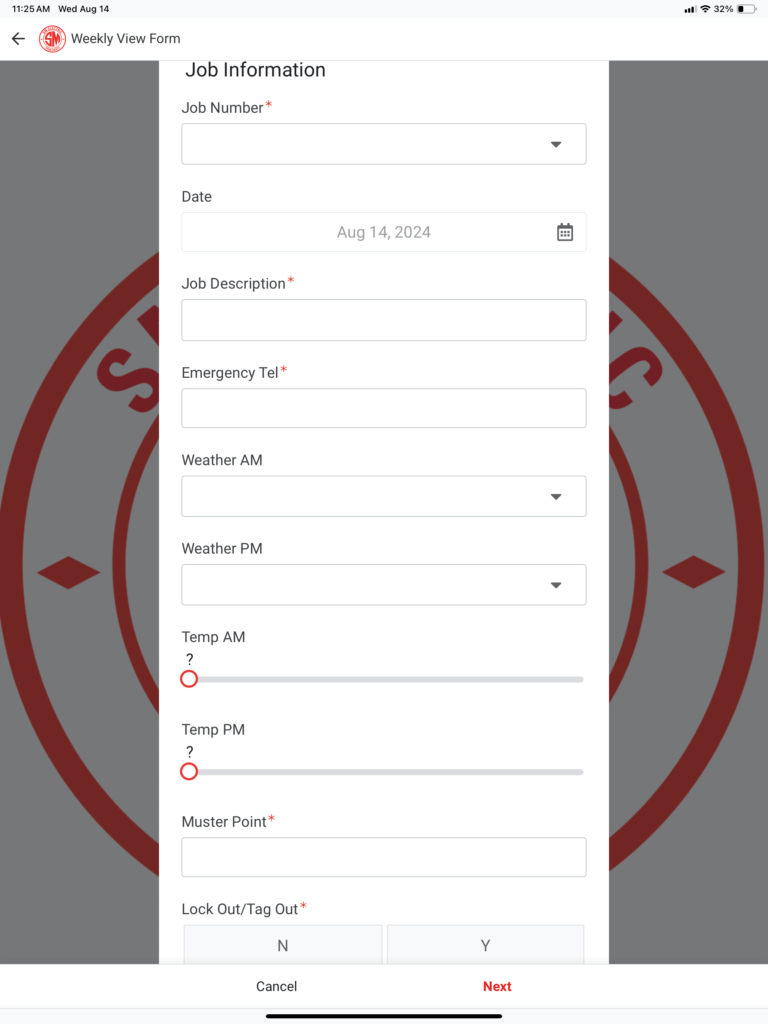
1 – The Information Page is general information.
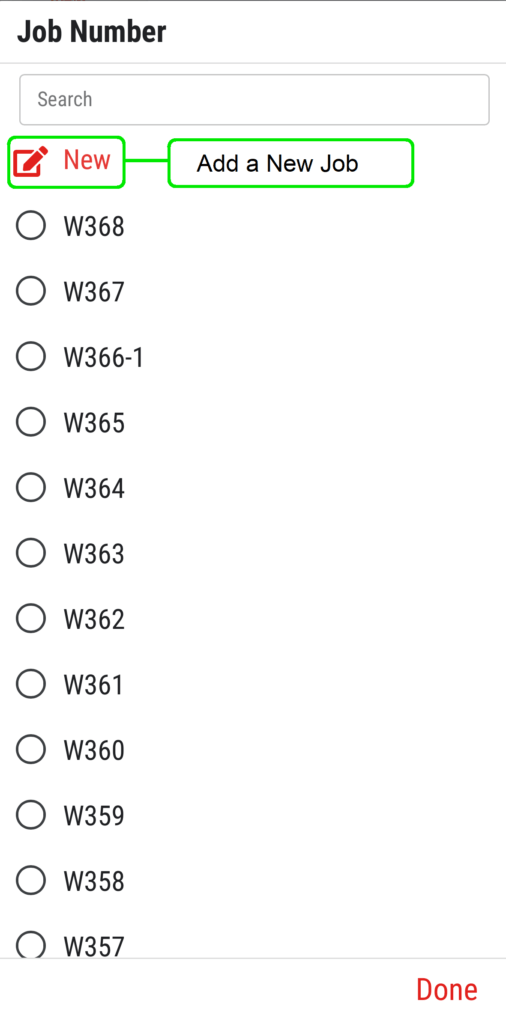
2 – Select your job from the Job Number drop down menu. If your job number isn’t listed you can add a new job by tapping “NEW“.
3 – Date will be auto filled with today’s date. Tailboards must be created on the day the work is performed. Please Note: Once a Tailboard is created the date cannot be changed.
4 – Fill in Job Description with a brief description of the job and work to be completed that day.
5 – Fill in Emergency Tel with the number to call in the event of an emergency.
6 – Select the current weather in Weather AM and the forecasted weather for the second half of your shift in Weather PM.
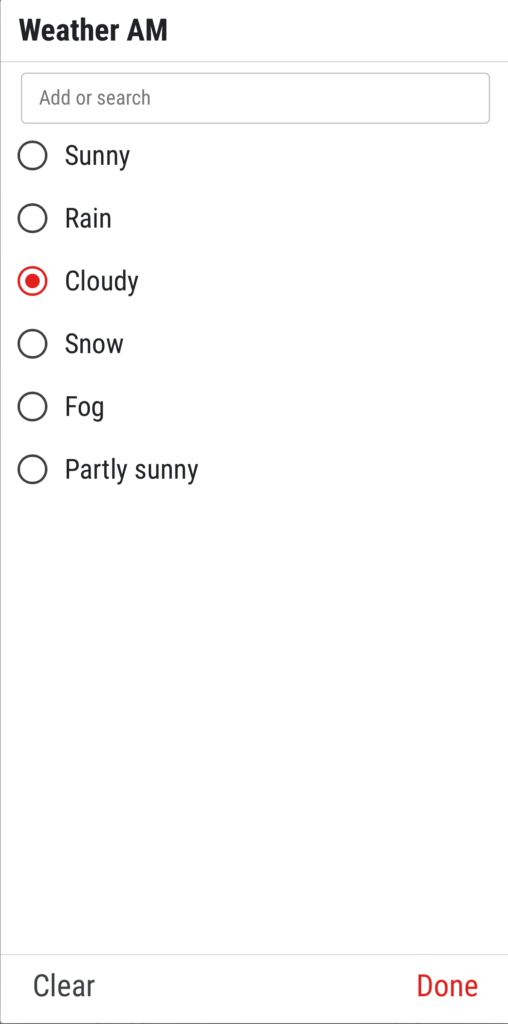
*If the current or forecasted weather description isn’t listed:
A custom description can be added by typing the custom condition in
Add or Search bar. Then tap “+” next to custom entry.
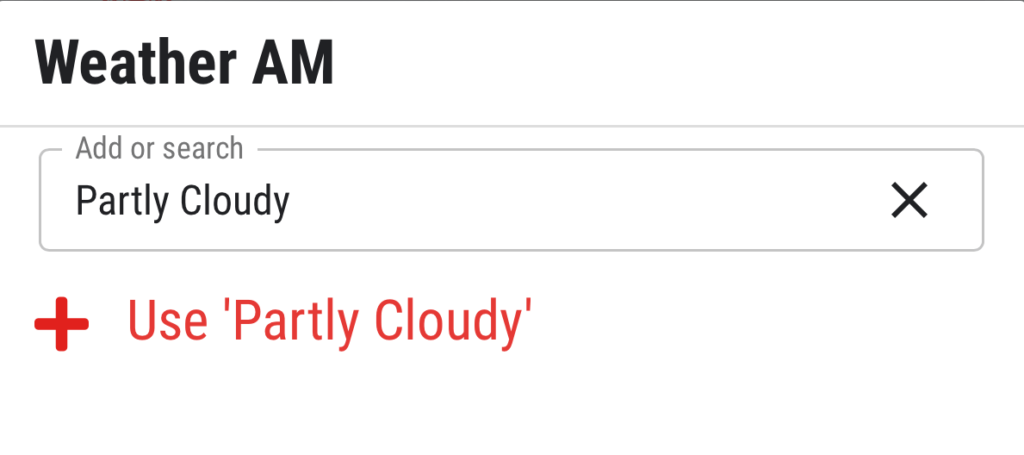
7 – Select the current temperature in the Temp AM slider and the forecasted temperature for the second half of your shift in the Temp PM slider.
8 – Fill in Muster Point with the meet up location designated for emergencies.
9 – For Lock out/Tag Out tap “Yes” if tag holder is required for the daily tasks otherwise tap “No“.
10 – Tap “Next” on the bottom left-hand corner of the screen to advance.
Lock Out/Tag Out Page Instructions
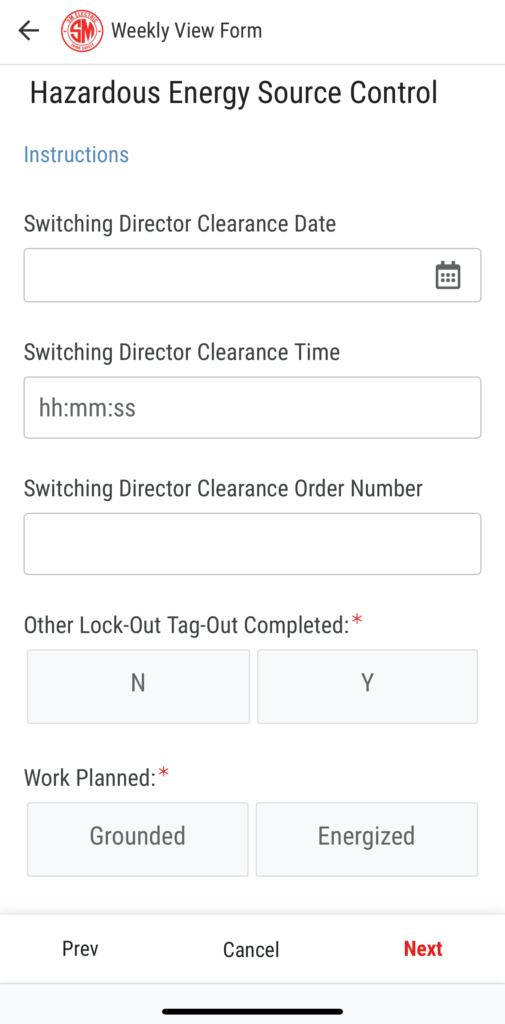
1 – Select a date in Switching Director Clearance Date.
2 – Enter a time in Switching Director Clearance Time.
*Please use 24hr format with two-digit hours, two-digit minutes and two-digit seconds
3 – Enter the order # in Switching Director Clearance Order Number.
4 – Select “Yes” or “No” in Other Lock-Out Tag-Out Completed.
5 – Indicate whether the work will be performed while equipment is “Energized” or “Grounded” in the Work Planned.
6 – Tap “Next” on the bottom left-hand corner of the screen to advance.
Hazards Page Instructions
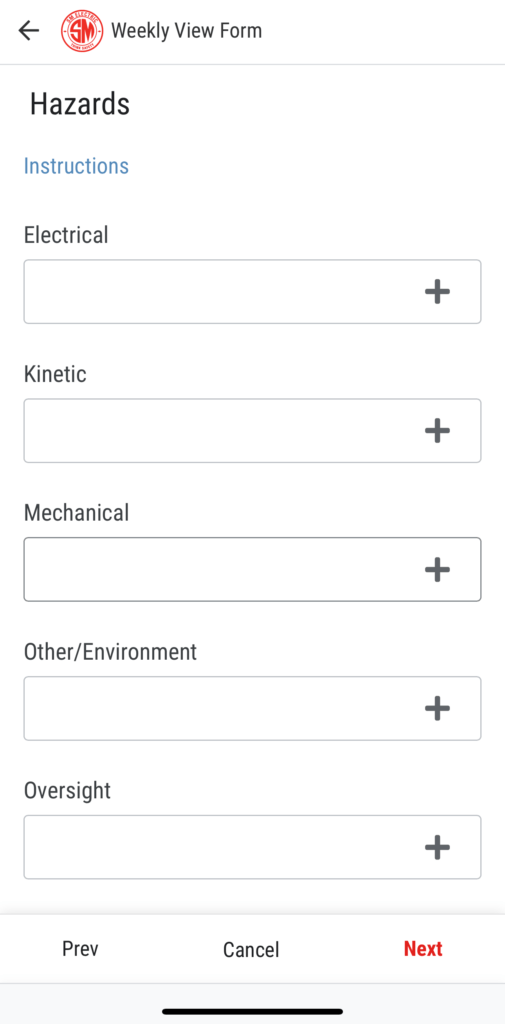
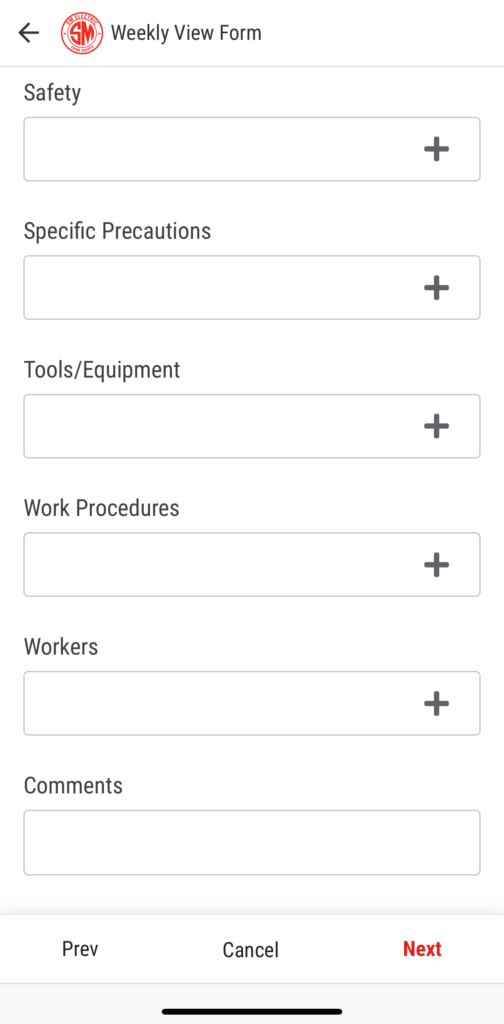
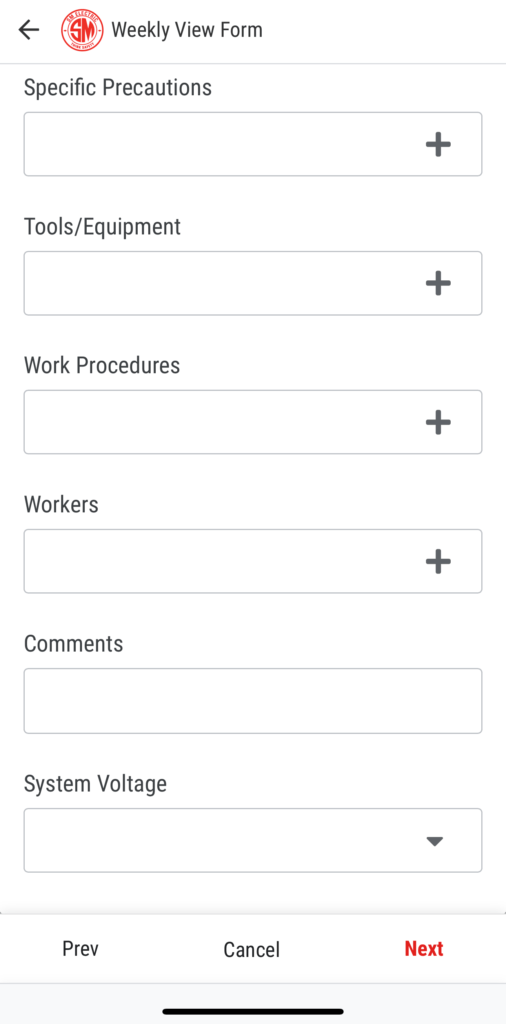
1 – Review each Hazards category by tapping on the “+” button on the right-hand side of the input field.
2 – Select all that apply and tap “Done” on the bottom right-hand corner.
3 – If applicable, enter any comments or clarifications in Comments.
4 – For System Voltage select the highest voltage workers could be exposed to for Energized/Grounded equipment on site. If none please leave blank.
5 – Tap “Next” on the bottom left-hand corner of the screen to advance.
Tasks Page Instructions
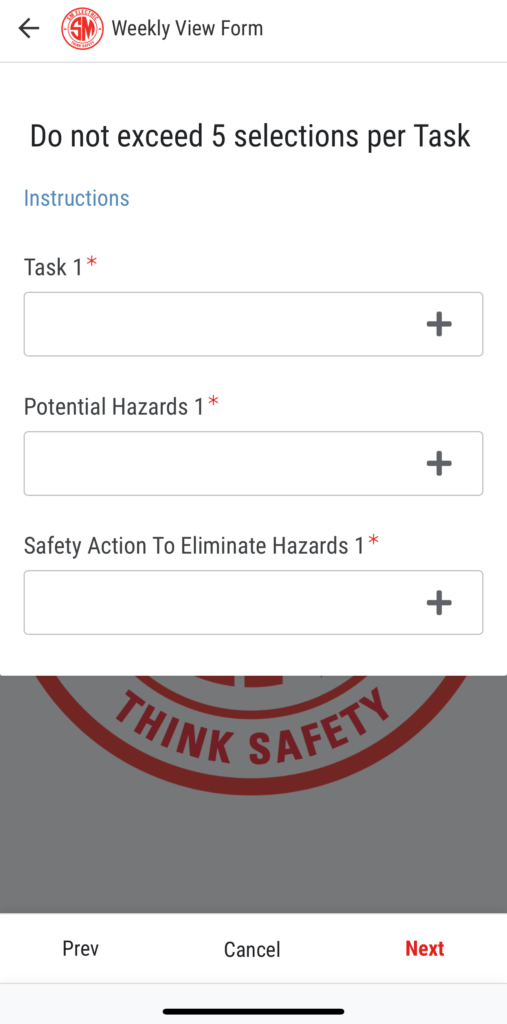
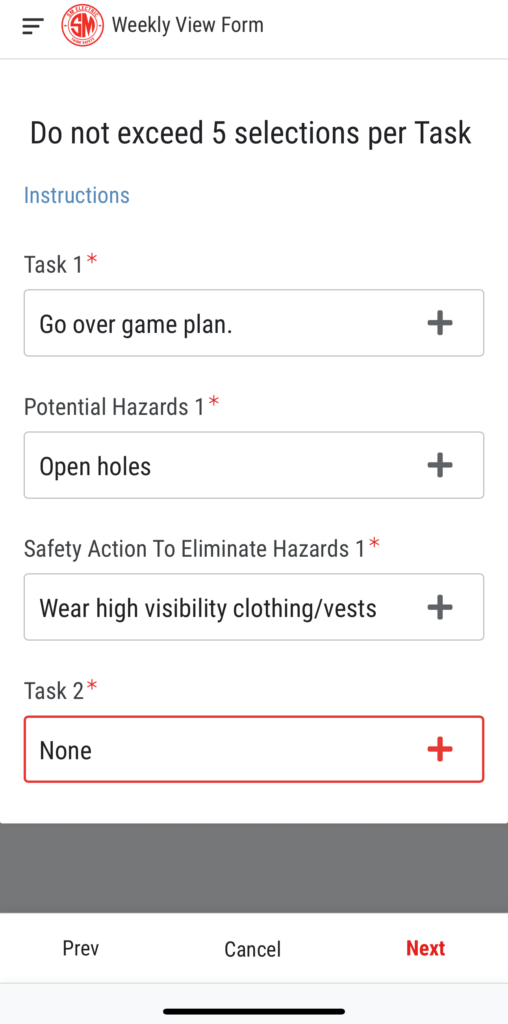
***IMPORTANT – Do Not Exceed 5 selections per field for Task, Hazards or Safety Actions
1 – Enter your daily tasks in Task 1-4 by tapping on the “+” button on the right-hand side of the input field.
2 – Enter possible hazards for the daily tasks in Potential Hazards 1-4 by tapping on the “+” button on the right-hand side of the input field.
3 – Enter safety actions for the potential hazards in Safety Action To Eliminate Hazards 1-4 by tapping on the “+” button on the right-hand side of the input field.
4 – The next daily task field will not appear until the current fields are completed. If there are no more tasks, please select “None” in the drop-down menu in the empty field.
5 – Tap “Next” on the bottom left-hand corner of the screen to advance.
Signature Page Instructions
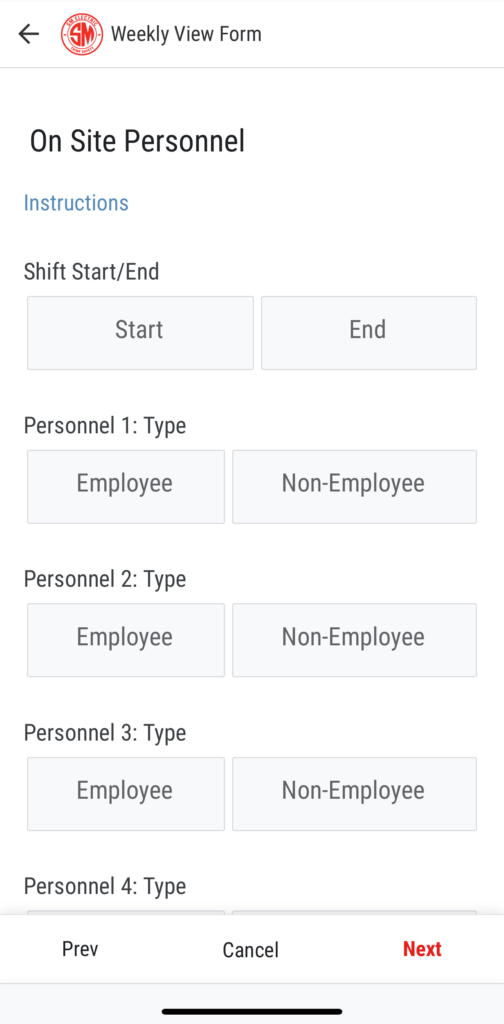
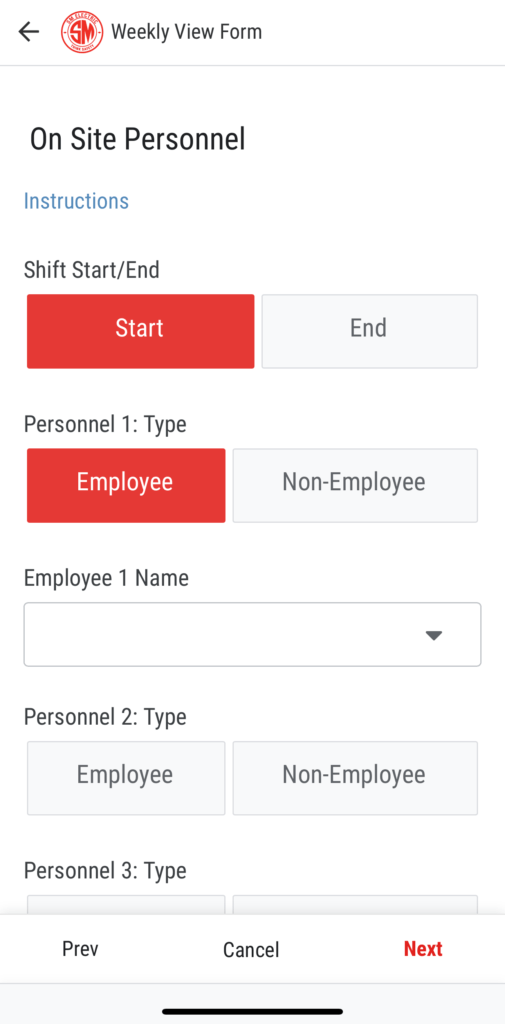
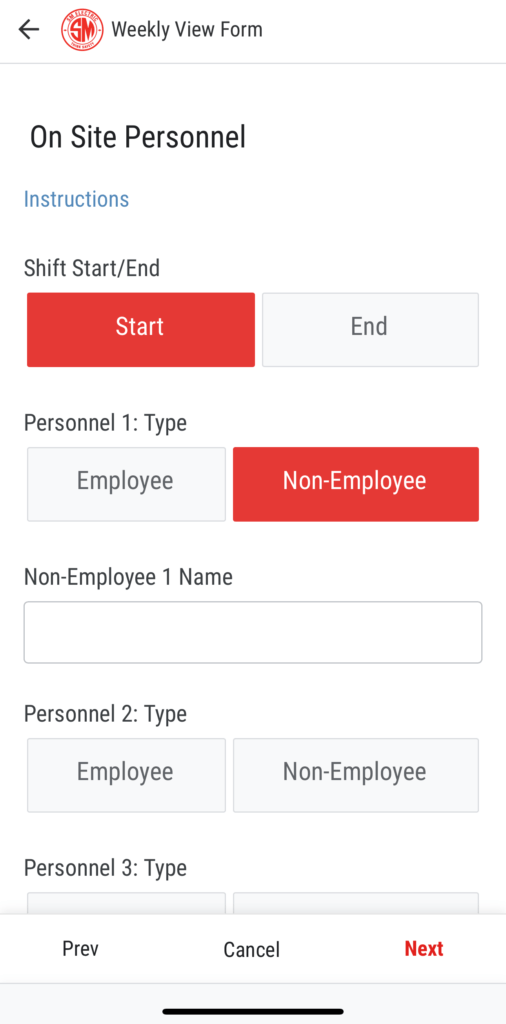
1 – Record all on-site personnel initials on the Signature Page. Tap “Start” in Shift Start/End at the beginning of the shift.
2 – Personnel Type. Choose “Employee” for SME personnel only. (Employee entry continue to 3A; Non-Employee entry continue to 3B)
3A – For SME Employees select the employee’s name from the drop-down menu in Employee Name. (Continue to step 4)
*If the Employee Name is not present, please add the Employee by tapping on the “New” button in the drop-down menu and follow the Add Employee instructions here
3B – For Non-Employees: Enter the person’s First and Last name in Non-Employee Name. (Continue to step 4)
4 – Initials field: Personnel must sign their initials under their name.
5 – All onsite personnel must initial before leaving the job for the day. Select “End” in Shift Start/End at the top of the screen and repeat step 4.
6 – Any and all personnel entering the job site during the shift must review and sign the daily Tailboard. Follow steps 1-5 above.
7 – Tap “Next” on the bottom left-hand corner of the screen to advance.
Foreman Page Instructions
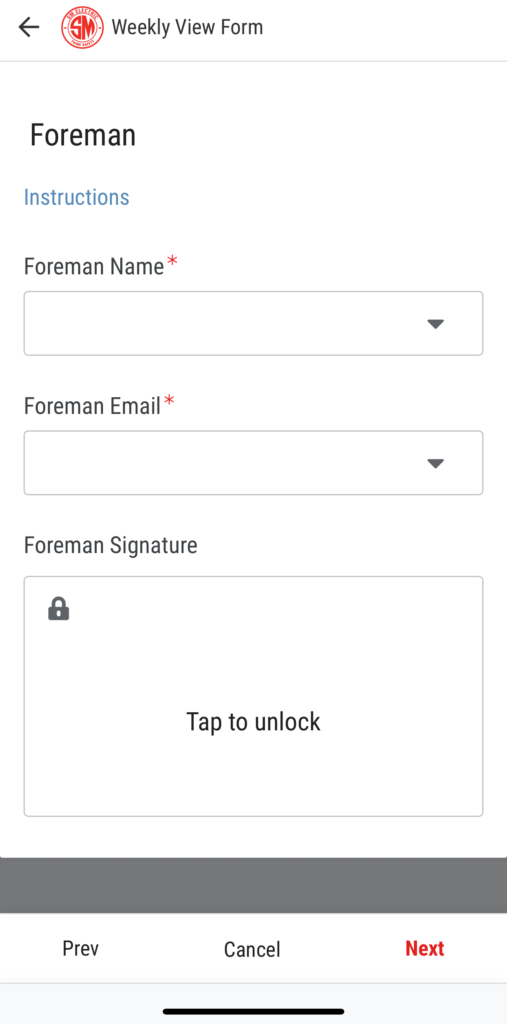
1 – Select the Foreman name from the drop-down menu in Foreman Name.
*If the Foreman name is not in drop-down menu, add the Foreman by tapping on the “New” button in the drop-down menu and follow the Add Employee instructions here.
2 – Select the Foreman’s email address from the drop-down menu in the Foreman Email input field. If the email doesn’t appear or is incorrect you can manually enter your email in the Add or Search bar and tap “+” next to manual entry.
3 – At the end of the shift the Foreman should sign the Tailboard in Foreman Signature.
4 – Tap “Next” on the bottom left-hand corner of the screen to advance.
Last Page Instructions
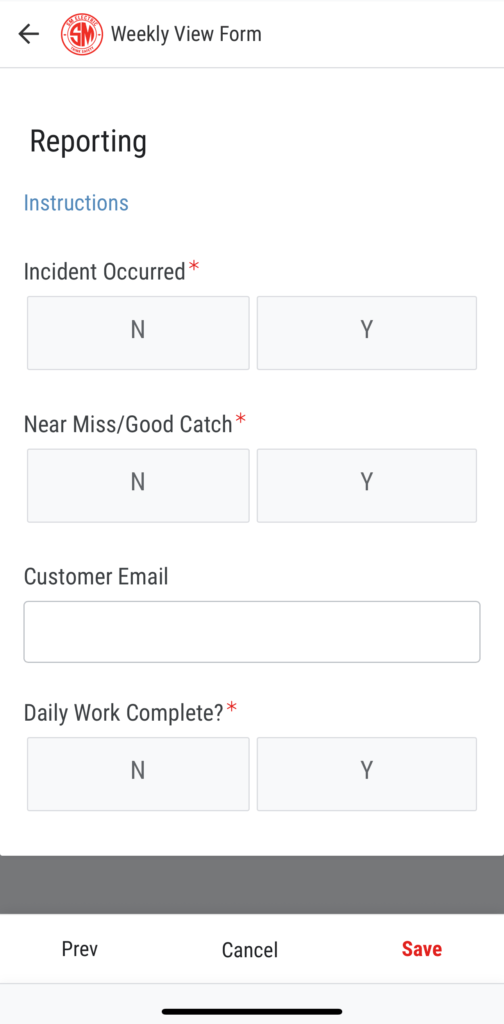
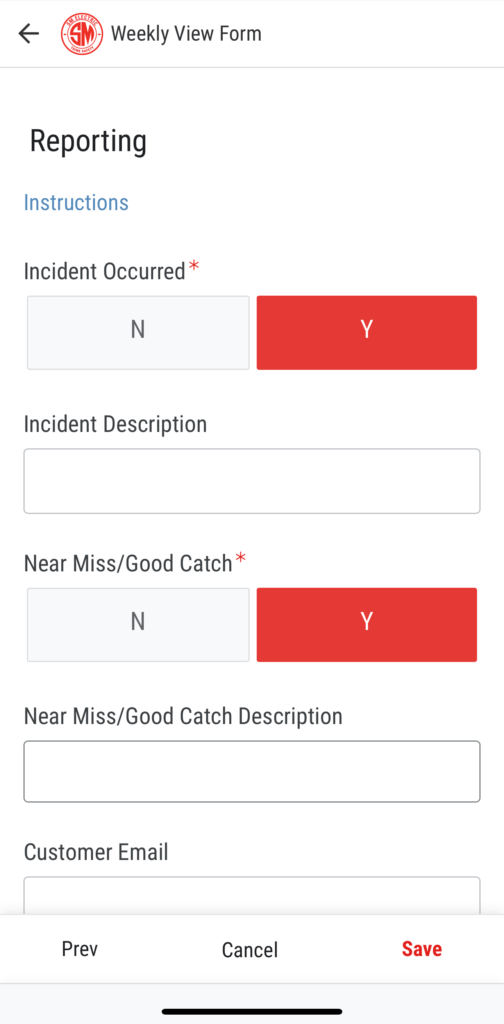
1 – If an incident has occurred select “Yes” in Incident Occurred and fill out a brief description in Incident Description. (Full details to be included on incident report.)
Otherwise select “No“.
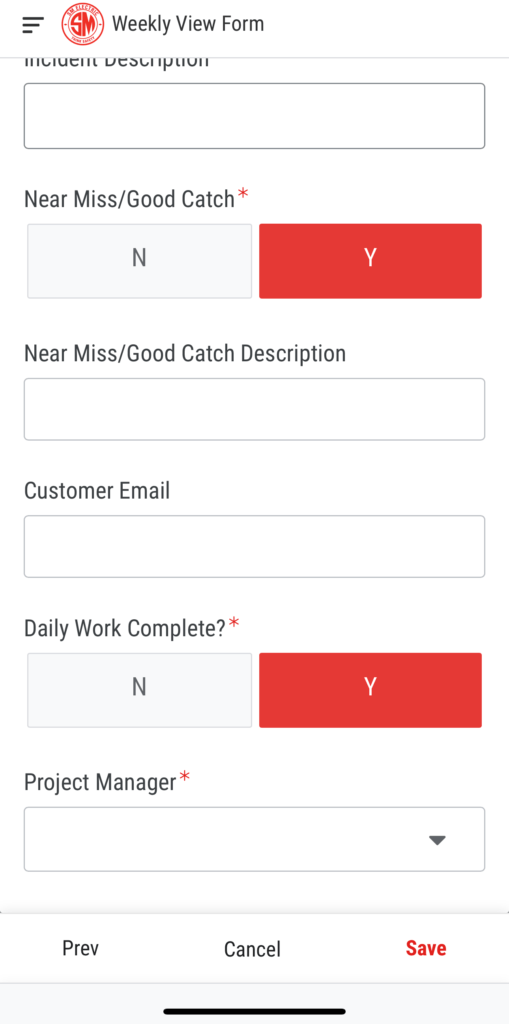
2 – If a Near Miss/Good Catch has occurred select “Yes” in Near Miss/Good Catch and fill out a brief description in Near Miss/Good Catch Description. (Full details to be included on Near Miss/Good Catch report.)
Otherwise select “No“.
3 – Use the Customer Email section to have a copy of the Tailboard emailed to the customer every time the document is updated.
4 – Only when all signatures are obtained and Tailboard requires no more updates, select “Yes” in Daily Work Complete.
Otherwise select “No“.
5 – Project Manager will only appear if Daily Work Complete is “Yes“. Select the SME project manager for the job in Project Manager.
*If the Project Manager is not present, please add the PM by tapping on the “New” button in the drop-down menu and follow the Add Employee instructions here
6 – The Tailboard should auto save after the last field is filled in. If not, please tap “Save” on the bottom right-hand corner of the screen.